
I discovered Spoonflower about a year and a half ago and had visions of all the wonderful things I would make and fabrics I would design but alas, things have not gone to plan with another little person in the family and I am only now just starting to look at designing some fabric. Even still, who knows when I will actually get it done!
In the meantime, there are countless beautiful designs already uploaded to Spoonflower that you can purchase and when they had a 2013 tea towel competition late last year, and then had a buy 1 fat 1/4 get 1 free sale, I made the most of the situation and ordered some tea towels to make up for Christmas presents. Below is the design I ordered. You can find it on Spoonflower here. This project would actually be great for any time of the year, not just Christmas!

These are pretty easy to make up and great for a beginner as it is all straight sewing! Here's my finished tea towels.

I thought I would add a few instructions on how to sew them up just in case anyone isn't quite sure what to do. It is really simple but wasn't quite as quick as I hoped. I like to have all raw edges hidden and I hate hemming stuff with a passion and that is all you do in this project. haha! Anyway, I was still really happy with how they turned out and the fabric is lovely. Make sure you get the tea towels printed on linen-cotten canvas. It is perfect for tea towels.
How to Finish Your Tea Towel
1. Order your chosen design from Spoonflower and make sure you have it printed on linen-cotten canvas in a fat quarter size. Just type tea towel in the search bar and you will find designs specifically made for tea towels!
2. Cut out your tea towel. Make sure you leave at least 2cm around the design for the hems. Depending on how the designer has designed the tea towel image, you may have a given rectangle to cut out or you may have to get out your ruler and measure it yourself.
3. Secure edges to prevent fraying if you wish. You can zigzag along the edge, overlock, or use pinking shears to do this. I didn't bother since it was covered up and fully enclosed...and I was in a hurry!
4. Fold over the long edges 1cm (or whatever size you want) and press. Then fold them over again 1cm, press, and pin to keep them in place. I used this awesome template from the Scientific Seamstress and it made the job sooooo much easier!

5. Now fold over the short edges in the same way you did the long edges. To get rid of some bulk in the corners, you can clip them like this. (The pic below shows a clipped corner when I started folding the long edge but it's the same idea for the short edges.)

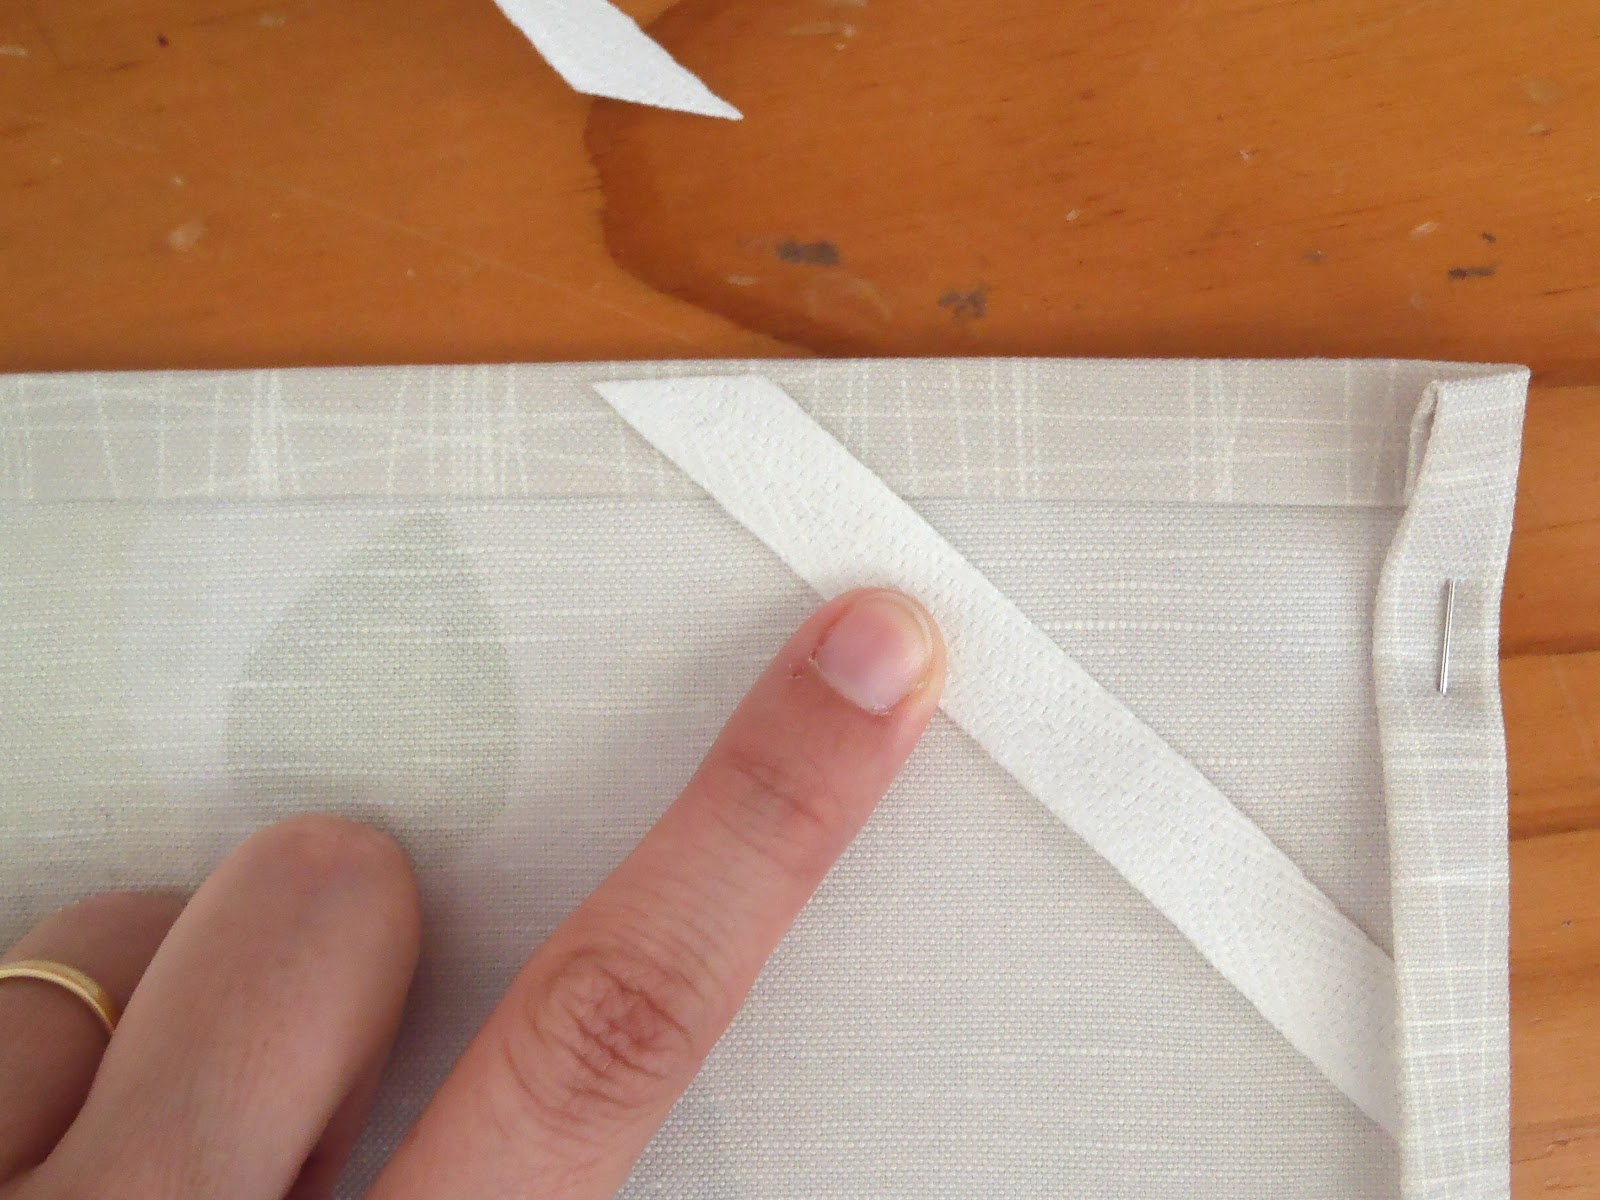
6. If you want, cut out a short section of twill and place this diagonally in one of the corners on the back. This can be used to hang it up if you like.
 |
| Sit twill under edges. |
 |
| Trim even with edges. |
 |
| Add a message if you wish. |
7. Now sew it up! Sew from the top side as the nicest stitching is always on the top. Start in the middle at the bottom or somewhere else that isn't too noticeable. Now, when I got to the corners, I sewed to the edge, then put the machine in reverse and sewed back about 1cm. I stopped at this point with the needle in the fabric and pivoted the fabric ready to start sewing down the next side. Before sewing down the next side, I put the machine in reverse again and sewed back to the edge, then continued sewing forward down the new edge as normal. This secured the corners well and saved having to completely stop and start stitching at each corner. Hopefully the photos below will make this explanation clearer.
 |
| The tag sewn in. |
Below you can see how I stitched along to the edge, backtracked to the point where the 2 lines of stitching intersect, then stitched back to the other edge and continued stitching forward down the new side. If this isn't clear to anyone, please let me know and I will post a diagram.
 |
| The corners securely stitched. |
If you happen to miss some of the folded over edge like I did below, just stitch along that area making sure it is caught in this time. If you are lucky, it will barely even be noticeable like mine.
 |
| The edge I missed catching on the back. |
 |
| The fixed up edge from the front! You can hardly even notice the extra line of stitching! |
And that's it!
In a nutshell...
1. Cut out.
2. Fold long edges over twice, press and pin.
3. Fold short edges over twice, press and pin.
4. Add a hanger if you want on the back.
5. Sew!
Now you have some lovely, personal, and handmade gifts! If you would like to make it even more unique, you could try designing and printing your own fabric. Here is a great tutorial on how to give that a go with old, handwritten recipes. Have fun!


